

Introduction: DIY 3D-Printed Leather Stamps


I will be showing you how I made my 3D-printed leather leather stamps using Sketchup and how to stamp them on leather. I used DXF files, but you can also use the 3D text tool on Sketchup.
Most online tutorials for making stamps require tracing with the line and arc tool on Sketchup, which can be tedious especially for intricate designs. There will be minimal 3D modelling for this, but you will need your images ready in DXF format.
Step 1: Prepare Tools and Materials Needed

Make sure you have your tools and materials ready.
Making the stamps
-Computer
-Sketchup (program)
-3D builder (program)
-3D printer
-DXF files (what you want to make a stamp of)
Tools and materials
-putty knife
-wood working clamps
-wood blocks
-leather
-water
-atomizer (optional)
-a stamping block or board (to stamp on)
Step 2: Make a Base for the Stamps

Open sketchup with the 3D printing template (in mm or inches) and create a base for your stamp with your desired dimensions. Use the rectangle tool and the push/pull tool. I used a 50mm x 50 mm base, and pulled it up by 4 mm. I used 4 mm because I wanted a 1 mm base height and 3 mm stamp height.
Step 3: Import the DXF or Create Your Text.


Import your DXF and place it onto your base. Alternatively, you can use the 3D text tool on Sketchup to create your stamp.
Be sure that it will be stamped correctly and adjust by flipping your DXF. For the text, you will have to flip the selection along the red axis. At this point, you may use the push/pull tool to adjust the size of your base.
Step 4: Explode and Intersect Selection


Select the entire model and right click. Explode the selection until it can no longer be exploded.
After that, click intersect faces with model.
Step 5: Pull Stamp to Desired Height


Use the push/pull tool to give your stamp the desired height. I made mine 3 mm tall, so i pulled the negative space down by 3 mm. I would suggest having a base at least 1 mm, and the stamp height at least 3 mm.
Optionally, you can choose to cut the parts of the base to the shape of your stamp. Use the line and rectangle tools.
Step 6: Print Using Program of 3D Printer


Use the program of the 3D printer you have. I used 3D builder to convert my .obj files from Sketchup to STL files, then used UPStudio to print the stamps. I prefer having a fill of 99% so the stamps are stronger for clamping.
Step 7: Prepare Leather for Stamping
To prepare your leather, cut it to your desired shape and size.
After, use an atomizer to spray the soft side of the leather with water until it is damp to the touch, but not dripping. You can also choose to use your fingers to spread water on this side of the leather.
Step 8: Clamp It Down

Place the leather smooth side up and carefully place your stamp on top. Put these between two pieces of wood to distribute the pressure evenly across the leather. I chose to clamp the leather between a scrap piece of wood and a table to provide stability. Leave this clamped for about 2-5 minutes, but remember that the longer you leave it, the sharper the image will be.
Step 9: End


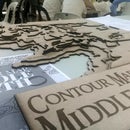
It is finished! Admire your work.
You can choose to re-clamp the leather if you feel the stamp did not show properly.


